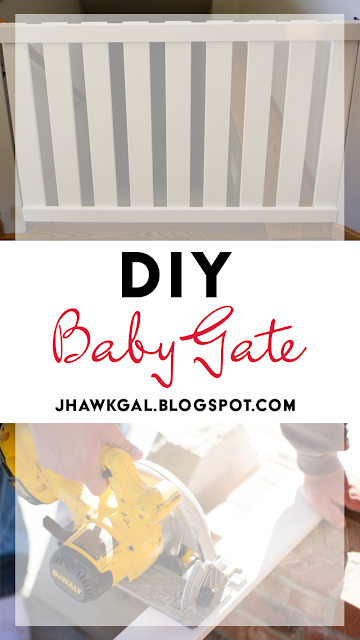
DIY: Baby Gate
This weekend was incredibly productive. After Addi and I's trip to Target on Saturday and a few DIY decor projects, Sunday rolled around and Matty randomly says to me, "wanna go to Lowe's and get the stuff to make that baby gate?" And after I manually put my jaw back in to place from it dropping to the ground, I said, "uhhh...yeah. Let's go."
Two hours later, we had a fancy hand-made baby gate adorning our stairwell.
I had been meaning to get a baby gate before Max got to the point where he needed it, but as it turns out he can now successfully climb the stairs so we're past that point. Now, Addi's showing signs of wanting to crawl so we figured it was as good a time as any to make our gate.
We have an extra wide stair case entrance thanks to a landing next to the stairs, so any store bought gate was not going to work. After a few searches on Pinterest, I got an idea in my head of what I wanted. Really all it took was a little measuring and a husband that was willing to help out-slash-do it all for me.
Materials:
- 1 1x2 8' trim board
- 3 2x4 8' trim boards
- 2 hinges
- 3 L-brackets
- 2 gate latches
- Misc. screws
- Drill
- Saw
- Husband willing to do the dirty-work
Start by measuring your stairwell. We measured width and the height we wanted the gate to be.
Next, mark your 1x2 board for the top & bottom of the gate according to the width of your stairwell.
Then divide your 2x4 boards into 3rds [or whatever the height you want your gate]. Leave part of the board for your "side" board.
Saw all of your boards where you marked them and lay them out.
I managed to figure out the math to make the spacing perfect. I'm still not sure how I did it, so good luck with that.
Screw your boards together. It helps if you have three people participating to hold the boards in place while one person screws them together.
We added this side board because it just worked out that way. You might not need one, it just depends on your setup.
If you do add one, attach the board with L brackets.
Now, attach the hinges to your gate & attach the gate to the wall.
Common sense tip: Find a stud.
Attach the latches to the gate & then the wall. We did one on the opposite wall as well so that we could leave the gate open & it wouldn't swing around all willy-nilly.
I painted it with some satin wall-paint we had left over from the move-in. The spare side board I painted the same color as the wall.
Correct me if I'm wrong, but this looks awesome, no?
SO much nicer than a cheap accordion-fold up baby gate that costs 70 bucks.
Also, it irritates the cats.
Dual-purpose gate.
Dual-purpose gate.


Come make two at my house! It looks so nice!
ReplyDeleteThis is such an impressive DIY project!
ReplyDelete