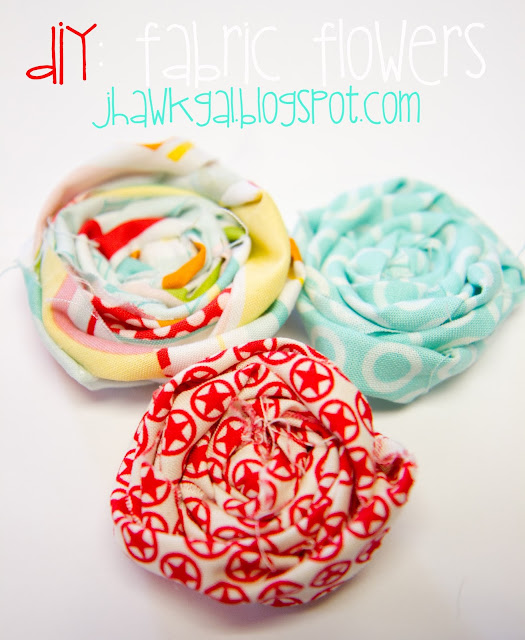
DIY: Fabric Flowers!
I know I've been hitting you with a lot of DIY projects as of late, but I've been REALLY busy getting Adelaide's room together! I warned you this might happen. ;)
Today, I bring you a TWO PART DIY series! You're welcome.
PART ONE:
Fabric Flowers
MATERIALS NEEDED:
Hot Glue
Fabric of Choice [a half yard will be more than enough]
Scissors
This might be my favorite project I've done for the nursery thus far for two reasons;
1) It turned out SO cute, I nearly cried
and
2) It was quick and easy.
Two very good things, eh?
Alright, now on to the tutorial.
STEP ONE:
Cut your piece of fabric into a 2" wide strip. You can make it as long as you want, depending on how large you want your flower to be. The longer the fabric, the bigger the flower. The strips I made for these flowers were about 20" long.
Tie one end of your fabric into a tight knot and cut off any excess fabric.
 |
| it's okay if strings are showing, it makes the flowers look cute! |
STEP TWO:
Twisting & bunching your fabric as you go, circle the fabric around the knot, hot gluing randomly to keep the flower from falling apart.
Continue twisting, bunching, gluing, and rolling your fabric until you get to the desired flower size. Make one last hot glue on the edge. Any remaining fabric [as seen below] should be hot glued to the bottom of the flower.
STEP FOUR:
Pull & pry at any edges that look out of place, [or look too perfect] until your flower looks just like you want it!
STEP FIVE:
Glue to whatever surface you choose!
This can be a barrette, bobby pin, lamp, or whatever your beautiful heart desires.
STEP SIX:
Relish in the fact that you just made the world's cutest flower in a matter of minutes.
And the fact that - if you were lucky - you didn't burn your finger on hot glue.
[I was not so fortunate.]
Part Deux Up Next!


Comments
Post a Comment
Thoughts? Love to hear 'em.