DIY: Cute Closet Dividers!
Hey homies.
Today, I bring you yet another DIY project, once again centered around my precious little girl [who just so happens to be over a POUND in weight and about 11 inches long!].
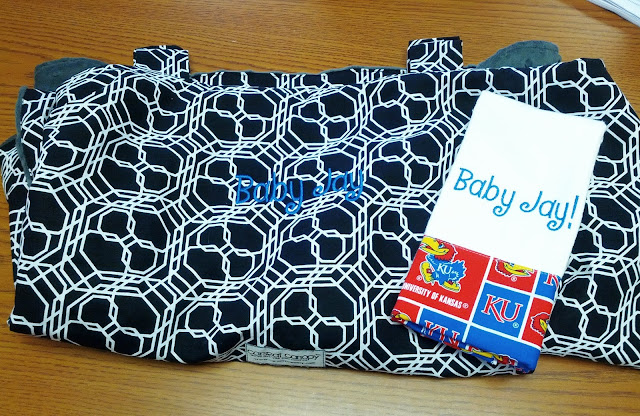
But first - I must show off the car seat cover my friend embroidered with "Baby Jay" and also surprised me with a matching KU burp cloth!!
When she brought it here, I nearly died of happiness.
 |
| Her Amazing BLOG featuring all of the work she's done! |
Okay, now on to the project. I'm somewhat of a psycho in the organizing department, in that when I'm excited about something and I have to wait for it to happen [i.e. birthing my child], I do everything I can to prepare for it.
This just so happened to include organizing Adelaide's closet.
Since we've been gifted a stupid amount of clothes already [thanks mostly in part to my mother and mother-in-law], it was driving me crazy not having them in order.
Insert: Cute Closet Dividers!
Now, you can spend a fortune on these via etsy or specialty baby stores,
OR
you can make your own for much cheaper.
Things you'll need:
Mod Podge [I used matte finish, but you can use glossy if you'd like]
Scrapbook paper of your choosing
Hanging Dividers [I got mine on amazon here]
Scissors
Foam brush or paint brush
Stickers for the numbers
Step One:
Trace your divider on the back side of your scrap book paper. [I traced 5 for sizes NB, 0-3, 3-6, 6-9, 9-12]
Cut out each.
Since I traced directly from the divider & there is a lip on the ones I bought, I had to trim about 2 cm inside the lines of each trace. This made the paper fit into the lip. Assess your cuts by placing them [dry] on the dividers. Cut excess as needed.
Step 2:
Using your foam brush, spread a thick layer of mod podge directly onto your divider. [Make sure to do only ONE at a time or your mod podge will dry!]
Immediately put your cut out on to the mod podge. Smooth out your scrapbook paper.
Step 3:
Spread a layer of mod podge on top of your scrapbook paper. You can do this either before or after you put the number stickers on. I did it after the sticker on this one, but before on the rest.
****PLEASE NOTE: I'm a dimwit and did my numbers upside down because the baby is sucking all of the lifeforce out of me and I have zero brain power. LEARN FROM MY IDIOCY, PEOPLE. Don't be that person.****
Continue this process for the rest of your dividers. It took me about an hour and a half to finish. Then set them aside to dry for about at least an hour. |
Then go hang those babies and relish in all of their organizational glory.
There's that - I hope you all enjoyed another DIY post, compliments of Mal.
I've got many more to come, so fear not.
Peace out -


Cute! I probably wouldn't have even thought to organize the clothes by sizes...show's how much I know about babies or organizing!
ReplyDelete